Monday, December 16, 2013

Quick Bathroom Makeover

When we bought our house last year, we spent 2 months remodeling before we moved in.  Nearly every room underwent dramatic changes.  One exception was the downstairs bathroom.  To call it a bathroom is actually a bit of an overstatement.  It's a toilet in a closet.

This weekend Sam decided it was finally time to replace the old toilet.  I decided that as long as we were clearing the room out we should do something about the hideous paint!  (The previous owners had an unhealthy relationship with the color brown.  The color in the bathroom looked like it belonged in a diaper.)

 This picture really doesn't do the color justice.  Even the ceiling was this horrible brown.

 Everything out and the first coat of paint on.

Finished product.

It was a simple enough change, and it only took an afternoon, but I'd say the end result is a vast improvement!

Wednesday, November 27, 2013

Dry Air

This time of year there isn't a lot of moisture in the air, especially when you have your heater on.  For me, the drier air causes dry skin, sinus problems, and lots of static shocks!  There are many ways to combat dry air in your home, like buying/installing humidifiers.

Or there's my favorite cheap and easy option.  Take a crock pot, fill it with water, and turn it up to high.  As the water turns to steam, it helps moisturize the air.  To make it even better, you can add things to the water to make the house smell nice.  Today I put in half a cinnamon stick and a couple of cloves.  When I made my lemon meringue pie I tossed in the leftover rinds.  My house now smells all citrus-y and spicy, perfect for the holidays!

Monday, November 25, 2013

DIY Personalized Coasters

For another Christmas gift idea, I decided to make some DIY personalized coasters! It was quick, easy, and cheap to make! I created 2 sets of 4 coasters.

Here are the items I used to create the coasters:
1. Ceramic coasters ( $1.00 each at the dollar store)
2. Mod Podge
3. A sponge brush
4. A different photo for each coaster (I used family and family pet pictures)


I used the ceramic coaster to measure my photos to make sure they fit perfectly on each of the coasters.
I used my sponge brush to "paint" the Mod Podge onto the ceramic coaster, then placed the photo onto it and held it down for a bit to make sure the photo was securely stuck in place. I then added 1-2 coats of Mod Podge on top of the photo and on the sides of the photo to make sure it was well sealed. After I allowed it to dry, I gave it a quick coat of non-yellowing, moisture resistant spray sealant (not pictured) for good measure. I let it dry then wrapped each set in some cute Christmas ribbon and was done! :)


                 The finished product!
(I added ribbon, but removed it shortly after)                        

Wednesday, November 20, 2013

DIY Dog Leash Organizer

This year for Christmas, we (more me than Zach) decided we wanted to make some homemade gifts for our friends and family since I think they are more fun to give as gifts, and, it gives me a reason to get crafty and make a mess! My brother -in-law and his girlfriend just recently moved into an apartment together, with both of their dogs, Hayden and Stanzi. While visiting them, I noticed that their dog leashes are kept on nails in the wall by their door and it wasn't very easy on the eyes, I thought to myself, I can fix this AND make a Christmas gift all at once! I busted out my purple craft tote and got to work!

Supplies I used:
1. 10x10 thin piece of wood
2. Paint
3. 1 sheet of scrap booking paper
4. Glossy Mod Podge
5. Command hooks
6. Stickers (letters for the names & puppy paw print ones for added cuteness)
7. A cute little wooden dog I found in the craft section at Walmart
8. A glue gun

I painted all 4 sides of the wood with gree paint and glued the green paper onto the wood with the mod podge. Put a coat of mod podge over the paper, let it dry, then added the command hooks and the stickers, and finished by using hot glue to add the decorative puppy to it! Can't wait to wrap it up and put it under the tree!

Sunday, November 17, 2013

DIY Scarf Holder

Fall is my favorite season and with fall come comfy cozy clothes! I love to mix and match scarves with my outfits throughout the fall and winter months, but never really had a place to store all these scarves. I normally just hang some on the doorknob, hang some off dresser drawers and others just thrown on top of the dresser. One day while browsing the internet, I stumbled upon a DIY scarf organizer that seemed pretty simple to put together and extremely cheap to make! It only required 3 items and only cost me $1.00 to make.  I decided to give it a try and was pretty pleased with the outcome!

Here are the 3 items it requires (I had 2 of the 3 items in my house already):

1. 1 plastic clothes hanger
2. Ribbon
3. Plastic shower curtain hooks, as many as you want to use (I got them from the dollar store)

Lay the hanger down and just start tying the shower hooks to the hanger with the ribbon. Once you have the top row of hooks tied to the hanger, start tying the shower hooks to each to hold them in place. Tie as many or as little as you want and you are done!


Tuesday, November 5, 2013

Canning

A couple of years ago, my mom and aunt took a canning class.  They learned a lot, had fun, and have made a bunch of canned goods since then.  I asked them to teach me how.  Next thing I know, I'm receiving canning supplies in the mail!  (Thanks, Pat!)

Unfortunately, we then failed to do anything with it.  I'd visit, or they'd visit, and we'd completely forget about canning lessons.  When we did sometimes remember, it would be right at the end of a visit.  So we'd say, "oh well, we'll do it next time."  This has been going on for about a year!  I decided that, no matter what, when they visited last week we were going to can something!  I picked a recipe, got ingredients, and got my supplies organized.  I was ready to go.

The visit didn't happen.  Mom wasn't feeling well, and Pat had other obligations pop up at the last minute.  Well crap.  Now I had ingredients and materials, but no guidance.  I decided to bite the bullet and do it on my own. 

I'm always a bit nervous trying new things, and this was no different.  I read my book, and saw that it looked like a pretty simple process.  This made me worry that I was missing something.  I anxiously and impatiently waited for my sauce to boil.  I nervously muttered the steps to myself as I filled my jars.  I couldn't sit still while I waited for the jars to process.  I tried to avoid looking at them in the 24 hours they needed to sit before I checked the seals.

I'm pleased to say that it all seems to have worked perfectly on the first try.  I don't think it's something I'll do regularly, but it seems like a useful skill to have.  I'm proud of myself for trying, and pleased with the results.


Tuesday, October 29, 2013

Pumpkin Carving

I am sad to admit that I carved my first ever pumpkin at the age of 34.  Growing up in Florida we didn't really have a "harvest" season.  It was kinda like, Summer, more Summer, a day to go get free candy, a day to eat a bunch of food, and a day to get gifts, then seemed right back to Summer.  So when I moved to Iowa with Nichole I was amazed to see the whole Harvest effect.  However my attempt to carve a pumpkin failed as I got very sick and spent days in bed and never got to carve it.  So this year I decided I wanted to carve a pumpkin!  And so Saturday after work my boyfriend and I went out for dinner, then stopped at the store to buy a pumpkin.  At first there wasn't much hope as they didn't seem to have any left.  Finally we found some in a bin at the back of produce.  Now I have never really spent much time around pumpkins so had no idea what to look for in a carving one.  So with help from my boyfriend we picked out one and brought it home.  He made me cut off the top and yank out all the innards.  I wasn't grossed out like I thought I would be though.  He showed me how to scrape it all out and then we set about picking out a pattern.  Out of all the ones I had bought (2 different kits!) I couldn't decide what to carve.  I needed something easy and the one I liked didn't seem all that easy.  It was a cat and it had curves.  That looked hard but he convinced me to go for it.  So we set about carving it up.  It was actually a lot of fun but a big learning experience.  I kept holding the knife wrong and cutting wrong.  Then I'd get frustrated since I didn't know what I was doing and hand it to him and say "You do it!"  But my ever loving boyfriend would show me the right way and put the knife back in my hand (brave man!) and away I'd go.  He did some of the really hard stuff like the tail and the eyes and mouth.  Over all it was a lot of fun and something I wish I had done more of growing up!  Now I have something to look forward to as he declared this would be a yearly thing now.  I've included some pictures of the process!  Over all a good time was had!

My Pumpkin

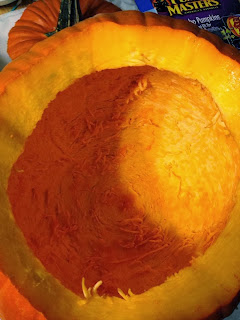
Cleaning it out
All clean inside!

Taping on the pattern
Cat pattern
He's helping me carve the hard parts
Finished!
I think I did good!


Tuesday, October 15, 2013

A new look for an old friend.


I have an old coffee table (seen on the right in this photo, covered in junk) that my grandparents got when they were newlyweds.  It's a nice table, solid, sturdy, and it has a shelf on each long side for books or magazines.  It's been well-loved over the years, and has lots of dings, stains, and character.

When I inherited it over 10 years ago, I professed an ambition to sand it down and refinish it.  Most people (including my mom and her siblings who grew up with it) thought this was a fine idea, but some objected.  A few thought I'd "ruin its character."  Others said, "It's a good idea, but you'll never actually get around to doing it."

Today, I did.  Just the top for now, figuring out the best way to do the sides, trim, and shelves is a project in and of itself.  I sanded off the old finish, and smoothed out some of the worst rough spots; but I left much of the character intact.  I was rather surprised to discover that the wood underneath is really beautiful!  Sam thinks it may even be mahogany.  We're finishing it with the same polyurethane we used to do the floors in our house, and even with just one coat it already looks fantastic!  The finish is extremely durable and should stand up to years of abuse by small children.  We're going to do at least one more coat of finish, and I'm so excited to see the final result.  I'll be sure to add a picture once it's done!

Edit:  Here's the finished table with three coats of polyurethane.  I'm quite pleased with the results, and look forward to refinishing the rest of it some day.

Thursday, September 26, 2013

The novelty of gardening.


This is one of my flower beds.  Before we bought our house last year, I'd never really done much gardening.  I always wanted to, and thought I'd probably like it. 

Last fall I dug out this bed (and a matching one on the other side of the sidewalk), tilled, put in the border, planted bulbs, and hoped for the best.  As spring arrived, I anxiously watched for signs of life.  I was not disappointed! 

Over all I'm very pleased with my first year of gardening projects (most of which are not pictured here).  None of them were perfect, but they all made me happy.  I already have plans in place for this fall, next spring, and even the year after that!  In a few years I should have a truly beautiful garden!